
You finish editing a video, export it, upload it to one platform, then another, then drop it into your bio link page. A day later, someone shares the clip without the caption, strips out your description, and now your work is floating around with weak attribution or none at all.
That’s where watermarking stops being a cosmetic extra and becomes part of the publishing workflow.
If you want to add watermark to video the right way, the job isn’t just placing a logo in a corner. You need a watermark that survives reposts, looks clean on mobile, doesn’t fight with platform UI, and still feels consistent when your videos are embedded on a central bio page alongside your other content.
Table of Contents
- Protecting Your Content in a Multi-Platform World
- Why Watermarking Is Non-Negotiable for Creators
- Choosing Your Watermarking Workflow
- A Practical Guide to Adding Watermarks
- Automating Watermarks with FFmpeg for Power Users
- Best Practices for Professional and Mobile-First Watermarks
- Frequently Asked Questions About Video Watermarking
Protecting Your Content in a Multi-Platform World
Video publishing used to be simpler. You made one version for one channel and moved on. That isn’t how creators work now.
Most creators repurpose the same asset across short-form platforms, longer-form platforms, embeds, newsletters, and link-in-bio destinations. The result is reach, but it also creates a tracking problem. Once a clip gets separated from its original caption, thumbnail, or post context, your branding can disappear fast.
A good watermark fixes part of that. It gives every export a built-in identity marker that stays visible when the video travels beyond the platform where it started. That matters even more when your audience discovers you through a central bio page that pulls together content from several places.
What watermarking actually needs to do
A useful watermark has to handle more than ownership signaling. It should:
- Preserve brand recognition: Your logo, name, or mark should stay attached to the clip.
- Work across layouts: Vertical, square, and horizontal versions need consistent treatment.
- Hold up on mobile: A watermark that looks balanced on a desktop preview can become tiny noise on a phone.
- Avoid platform clutter: Placement has to account for social buttons, captions, and player controls.
- Stay efficient at scale: If you publish often, the process can’t depend on manual nudging every time.
Practical rule: If your watermark only looks right in your editing timeline, it isn’t finished yet.
The small choices separate polished work from amateur exports. File type matters. Position matters. Opacity matters. Timing matters too, especially when you want your brand present without covering important on-screen action.
Watermarking is best treated like subtitles or color export settings. It belongs in the final publishing checklist, not as an afterthought you remember after the upload is already live.
Why Watermarking Is Non-Negotiable for Creators
A creator posts a short to TikTok, repurposes it for Reels, adds it to a bio link page, and a week later that same clip is floating around in embeds and reposts with no caption attached. The video still gets views. The brand connection is what disappears.

Watermarking matters because video distribution is fragmented. Viewers might find you on a social app, inside a messaging thread, on an embedded player, or through a bio page that collects your best work in one place. Many tutorials still frame watermarking around one platform at a time, usually YouTube or Instagram. That approach misses a common publishing reality. 73% of content creators use multiple platforms, according to Canva’s watermark video overview.
The primary problem is attribution drift.
A video rarely stays attached to its original caption, username, or post context. It gets downloaded, screen-recorded, reposted, clipped into compilations, or embedded on pages where the platform chrome is gone. Once that happens, the viewer can remember the clip and forget the creator.
A watermark closes part of that gap. It gives the file its own attribution layer, which matters more on mobile where usernames, captions, and profile links are easy to miss. It also matters on bio link pages, where several videos from different platforms sit next to each other and need to feel like they belong to one brand, not a pile of disconnected exports.
Why creators keep using it
A good watermark does four jobs at once:
- Keeps your identity attached to the asset: If the post context disappears, the video still points back to you.
- Supports brand consistency across a bio page: Shorts, Reels, product demos, and testimonials look published by the same creator or team.
- Reduces low-effort reposting value: It does not stop theft, but it makes stolen clips less clean and less useful.
- Improves recognition on small screens: A subtle but readable mark helps viewers connect repeated clips to the same source.
That last point gets overlooked. Desktop previews hide bad watermark decisions. On a phone, a mark that is too small vanishes, and a mark that is too bold feels cheap fast.
A watermark will not solve ownership disputes by itself. It does make attribution survive longer as the file moves.
There is also a presentation benefit. Clean, consistent branding makes a video feel intentionally published. That matters when someone lands on your bio page, opens a few videos, and decides in seconds whether the creator behind them looks established.
What creators lose when they skip it
| Situation | What the viewer experiences |
|---|---|
| A clip is reposted without the original caption | They see the content but have no clear path back to the creator |
| A video is embedded on another page | The platform context disappears, so brand memory weakens |
| Several clips appear together on a bio link page | The collection feels visually inconsistent |
| An older video resurfaces months later | New viewers cannot easily connect it to your current brand |
For creators publishing across multiple destinations, watermarking is less about paranoia and more about keeping attribution intact long enough to matter. The clip may travel. Your identity should travel with it.
Choosing Your Watermarking Workflow
The best way to add watermark to video depends less on the feature list and more on how you publish. A solo creator making three clips a week needs something different from an agency exporting batches every day.
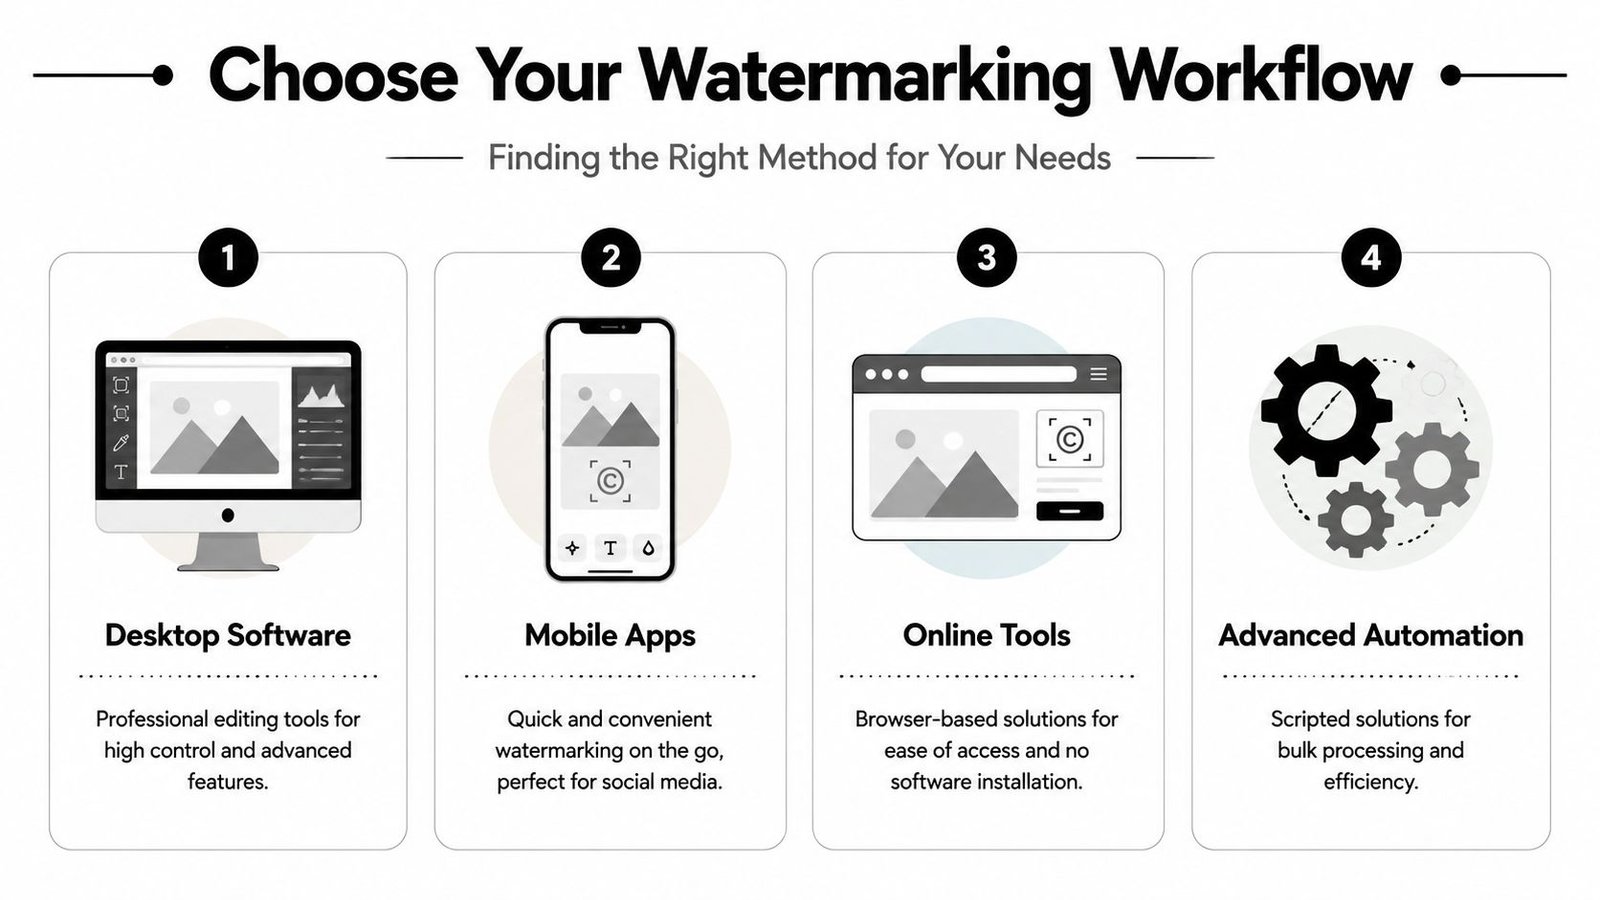
Some workflows give you precision. Others give you speed. A few give you both, but only after setup time. The right choice comes down to four practical questions: How often do you publish? How much control do you need? Do you work mostly on desktop or phone? Do you need to process many files in one go?
Watermarking Method Comparison
| Method | Best For | Cost | Batch Processing |
|---|---|---|---|
| Desktop Software | Editors who want fine control | Varies by tool | Available in some workflows |
| Mobile Apps | Fast social publishing | Usually accessible for individuals | Limited |
| Online Tools | Quick browser-based edits | Varies by platform | Sometimes available |
| Advanced Automation | High-volume publishing | Tool setup time, often low software cost | Strong |
Desktop software
Adobe Premiere Pro and DaVinci Resolve are the strongest options when placement, timing, opacity, and scaling all need careful tuning. If you’re already editing there, adding a watermark is efficient because the clip never leaves your main timeline.
Desktop tools also make it easier to build templates. That’s useful when you need repeatable branding across vertical and horizontal exports.
The trade-off is speed for casual use. If you just need to watermark a quick phone clip before posting, a full editing suite can feel heavy.
Mobile apps
CapCut and InShot are practical when your content starts and ends on your phone. For creators who shoot, edit, caption, and publish on mobile, these apps remove friction.
Their weakness is consistency at scale. It’s easy to make one clip look right. It’s harder to keep dozens of exports perfectly aligned without a tighter template system.
Online tools
Canva and Kapwing are useful middle-ground choices. They’re approachable, browser-based, and good for creators who don’t want to install anything.
They work well for occasional edits, team collaboration, and quick revisions from different devices. Where they tend to fall short is deep timeline control. If you want frame-specific watermark appearances or highly customized export logic, desktop tools are usually stronger.
Advanced automation
FFmpeg is the power-user route. It’s ideal when you need consistent outputs across many files and don’t want to manually drag a logo into every timeline.
The moment watermarking starts to feel repetitive, automation becomes a workflow decision, not a technical hobby.
The catch is obvious. FFmpeg isn’t visual. If you like dragging, resizing, and previewing with the mouse, command-line tools will feel less friendly. But for repeated production, they save time and reduce inconsistency.
A Practical Guide to Adding Watermarks
A clip can leave Instagram, get reposted to TikTok, end up inside a bio link page, and lose its caption context in the process. If the branding lives only in the post text or platform UI, attribution disappears fast. The watermark needs to survive that jump and still look clean on a phone screen.
The production steps are simple across nearly every editor. Import the video, place the watermark on a layer above it, scale it, position it, adjust opacity, then export. The part that separates clean branding from amateur branding is consistency. Use the same logo file, corner placement, margin, and opacity across every platform version so your videos look related when someone sees them side by side on a bio link page.
Start with the asset itself. Use a transparent PNG for the watermark file. JPG logos usually bring a solid background that looks cheap once it sits over footage, especially on dark scenes or compressed mobile exports.
Desktop software workflows
Premiere Pro and DaVinci Resolve give the most control when the watermark needs to coexist with captions, product labels, lower thirds, or CTA text. Add the watermark as a graphic layer above the footage, then build from a repeatable template instead of treating each export like a one-off job.
A practical desktop workflow looks like this:
- Import the video and watermark PNG
- Place the logo on a track above the footage
- Set scale once and save it as part of your sequence or preset
- Position it inside the safe area, not flush against the edge
- Lower opacity until the mark reads clearly without pulling focus
- Scrub through the full edit and check collisions with captions and on-screen text
- Export platform-specific versions only after the watermark placement is approved
That safe-area check matters more than many guides admit. A watermark can look fine on a desktop preview and still get crowded by app UI, caption overlays, or a bio link page thumbnail crop. For vertical video, I usually keep a little more breathing room from the bottom edge than instinct suggests.
Background changes matter too. If the footage moves between bright outdoor shots and dark interiors, test the logo across both before you lock the export. A single-color mark often holds up better than a detailed full-color logo because it stays readable at smaller sizes.
Mobile apps workflows
CapCut and InShot work well for fast publishing from a phone, but small screens make precision harder. That changes the standard. The watermark has to be simpler, slightly smaller, and placed with mobile interface clutter in mind.
Use this checklist while editing on mobile:
- Add the base video first: Finalize the clip order before placing the logo.
- Insert the watermark as an overlay or sticker layer: Keep it independent so you can adjust it without affecting the footage.
- Choose a corner with room around it: Top-right or bottom-right often works, but check where captions and platform buttons appear.
- Scale for a phone screen, not a desktop preview: If it feels a little large in the editor, it will usually feel too large in the feed.
- Preview the export at full screen on your phone: Compression can make thin logos disappear or make high-opacity logos feel heavy.
For creators publishing to multiple destinations from mobile, the main goal is visual continuity. A viewer who opens your bio link page should recognize the same brand mark across Shorts, Reels, TikToks, and teaser clips without feeling like every video was stamped by hand in a different app.
On mobile, the best watermark is easy to notice and easy to ignore.
Online tools workflows
Canva and Kapwing are useful for quick browser-based edits, shared workflows, and light team collaboration. The process is familiar. Upload the clip, add the logo, place it, reduce opacity, then export. The trade-off is less timeline precision than a desktop editor, so planning the watermark behavior upfront helps.
Timing is one of the few variables worth deciding before you start. CaseGuard’s watermark workflow article explains that watermarks can stay on for the full video or appear only during selected segments. In practice, short clips often benefit from early brand visibility, while tutorials and demos usually work better with a persistent, low-key mark that stays out of the way.
Here’s a practical rule set:
| Video type | Better watermark approach |
|---|---|
| Short clips | Show branding early, then keep it subtle |
| Tutorials or demos | Use a persistent watermark throughout |
| Promo edits | Increase visibility if brand recall matters more than immersion |
| Story-driven edits | Lower opacity and avoid interrupting emotional beats |
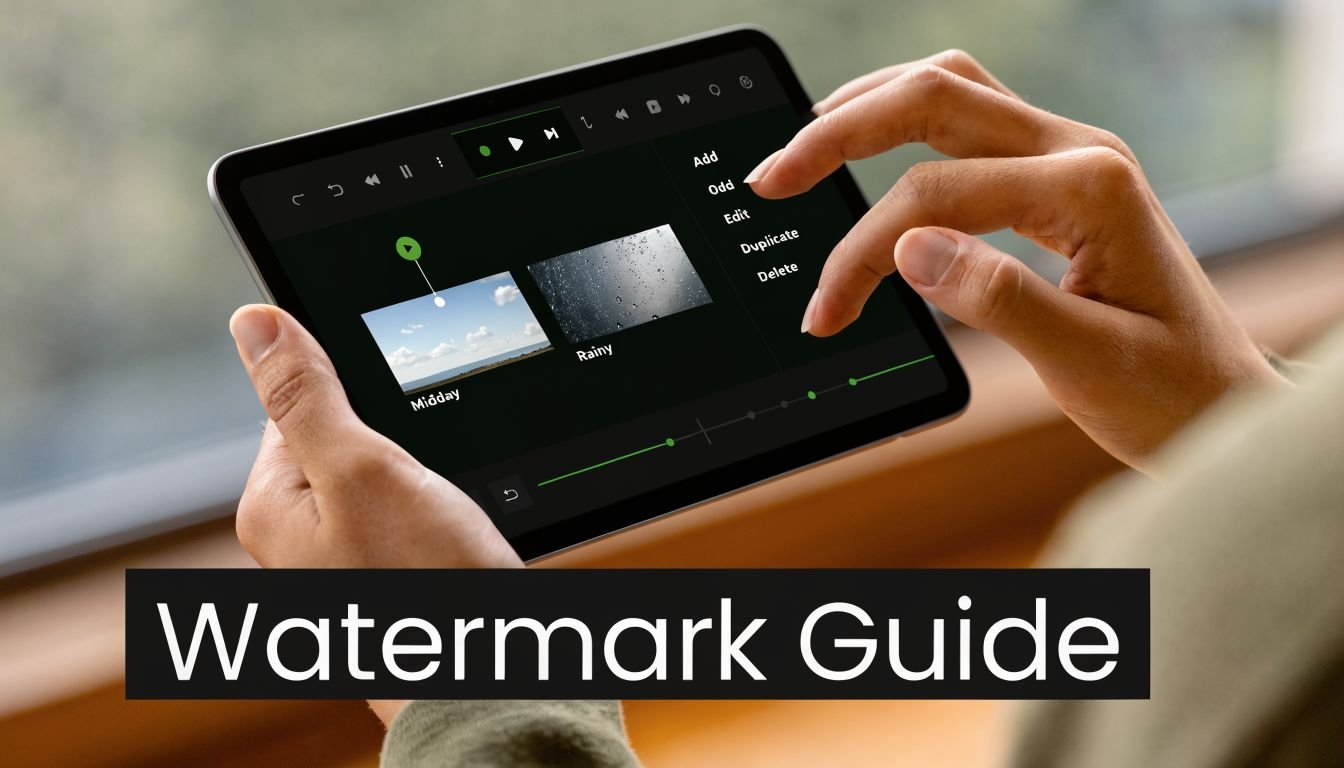
If you want a visual walkthrough before trying your own export, this quick demo helps illustrate the general overlay process:
The process stays consistent across tools. The professional difference comes from the small decisions: a clean PNG, repeatable placement, safe margins for mobile UI, and branding that still makes sense when the video is watched outside its original platform context.
Automating Watermarks with FFmpeg for Power Users
A batch workflow matters when the same clip is headed to TikTok, Reels, Shorts, and then onto a bio link page where platform-native attribution often disappears. In that setup, the watermark is not just decoration. It is the branding layer that stays attached when the video gets reposted, embedded, cropped, or watched without the original caption.
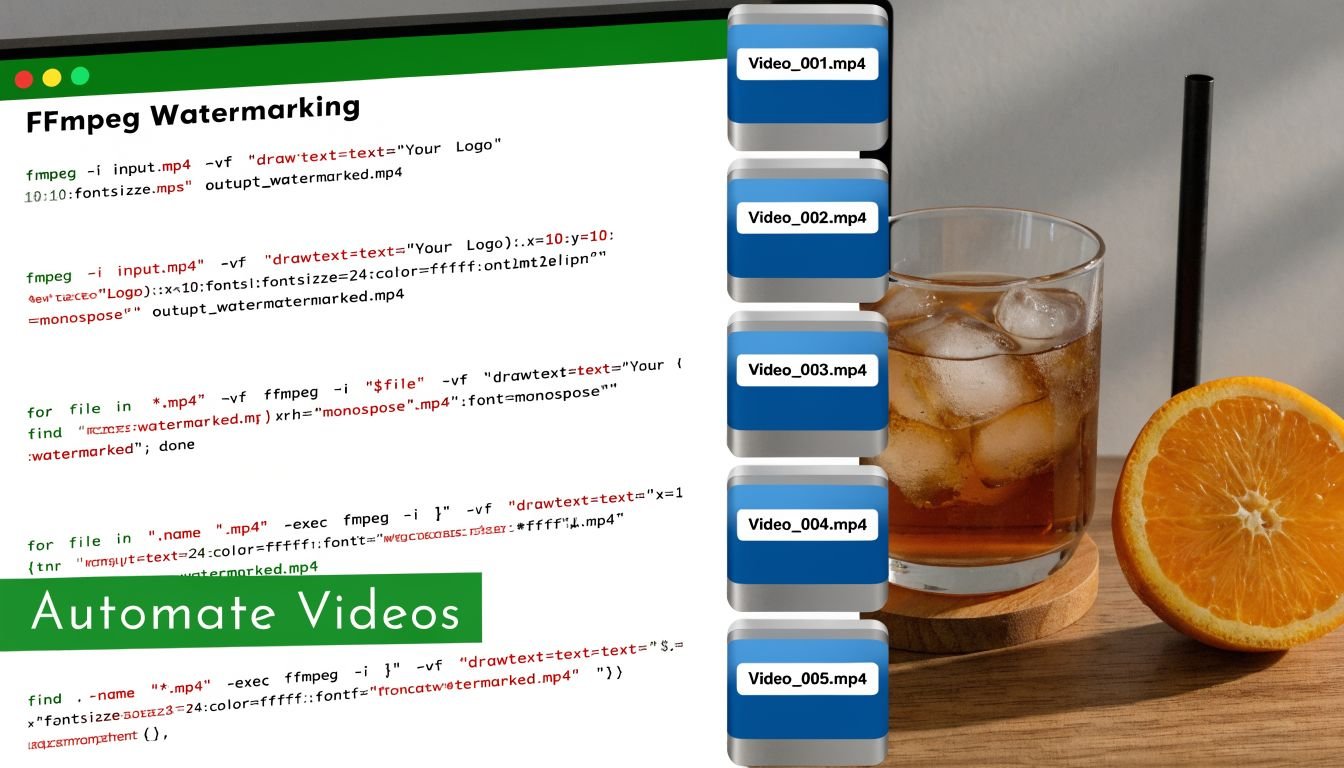
FFmpeg is the fastest way to make that repeatable. Once the command is set, every export uses the same file, the same position, and the same margin. That consistency is what keeps a brand looking organized across a stack of short-form clips.
A basic FFmpeg command
Use this as a clean starting point:
ffmpeg -i input.mp4 -i watermark.png -filter_complex "overlay=W-w-24:H-h-24" output.mp4
This places the watermark near the bottom-right corner with a 24-pixel margin.
What each part does
-i input.mp4loads the source video.-i watermark.pngloads the watermark asset.-filter_complexapplies the overlay filter.overlay=W-w-24:H-h-24places the watermark 24 pixels from the right and bottom edges.output.mp4sets the export filename.
The logic is simple once you use it a few times. W and H refer to the video dimensions. w and h refer to the watermark dimensions. Change the math and you change the corner.
For example, overlay=24:24 puts the mark in the top-left. overlay=W-w-24:24 moves it to the top-right.
What actually matters in automated watermarking
The command is the easy part. Asset quality is where batch jobs usually go wrong.
Use one approved transparent PNG. Keep it trimmed tightly so FFmpeg positions the actual logo, not extra blank canvas. If the image file includes uneven padding, your placement will look inconsistent even when the coordinates are technically correct. That mistake shows up fast on mobile, especially on bio link pages where videos sit in compact embeds and every pixel of spacing feels more obvious.
Opacity is another place where power users save time by deciding once. If the watermark feels too loud, lower the alpha in the source PNG before batch processing, or add transparency in the filter chain. Do not solve that clip by clip unless the content substantially changes. A standard treatment is faster and usually looks more professional across a series.
Good automation scales judgment. Bad automation scales avoidable mistakes.
Test one export before running the full batch. Check it on a phone, not only on a desktop monitor. A watermark that feels balanced in a large preview can end up too close to UI overlays, too small to read, or too sharp against compressed footage once the video is viewed in a mobile feed or collected on a bio link page.
If you produce content regularly, that single FFmpeg template can save hours every month. Beyond that, it keeps attribution attached to your work wherever the clip ends up.
Best Practices for Professional and Mobile-First Watermarks
A clip gets reposted to Instagram, saved to a camera roll, shared in a group chat, then added to a bio link page with six other videos. By that point, the platform context is gone. The watermark is often the only branding that still travels with the file.
That is why mobile-first watermarking deserves its own standard. A mark that looks polished in an editing preview can fall apart once the video is compressed, embedded, and viewed on a phone beside other content from different campaigns.
FastPix notes in its watermarking guide that more than 85% of social media video viewing happens on mobile, which matches what many creators already see in analytics. On a bio link page, that viewing context gets even tighter. The video frame is smaller, surrounding buttons compete for attention, and weak branding disappears fast.
Design for the smallest screen first
Start with the phone screen as the primary canvas. Then check whether the watermark still feels balanced on larger displays.
Fine lines, thin type, and detailed badge-style logos rarely survive mobile playback. A simplified wordmark or a compact logo variant usually performs better, especially when several clips appear together on a bio link page and you need instant recognition across the set.
A reliable review process is simple:
- Export an actual sample clip: Editor previews hide scaling and compression problems.
- Check iPhone and Android playback: Rendering differences still show up.
- View the video inside the final context: Test the social post, embed, or bio link page, not only the gallery app.
- Judge it at normal viewing distance: If the branding only works when the phone is close to your face, it is too small.
- Check against captions and UI: The cleanest corner in the edit can become the busiest corner in the actual feed.
Keep branding consistent across formats
Professional watermarking is less about adding a logo once and more about keeping the mark recognizable across horizontal, square, and vertical exports.
Use the same logo family, opacity range, and margin rules across every ratio. That consistency matters more when your videos are aggregated on a bio link page, because viewers scan several thumbnails and embedded players in one session. If each clip uses a different watermark style, the brand feels fragmented even when the content itself is strong.
I usually treat watermark rules like a mini brand system. One approved asset. One or two placement options. A defined size range for 9:16, 1:1, and 16:9. That saves time and avoids the common habit of improvising every export.
Placement and opacity need context, not guesswork
Corners still work well, but only if they stay clear of subtitles, platform buttons, and in-frame text. Right-side placement often holds up well, especially for videos that may later appear on a bio link page where surrounding page elements already pull attention from the left.
Opacity should protect attribution without fighting the footage. Very low opacity disappears on bright scenes. Very high opacity makes the video feel stamped. The better approach is to set a narrow working range and adjust only when the footage gives you a clear reason.
One more rule matters in practice. Review the watermark in motion. A mark that looks subtle on a paused frame can become distracting when faces, hands, or product shots move directly underneath it.
The best result is easy to miss because it does its job unobtrusively. Viewers can identify the brand at a glance, the footage still feels clean, and the watermark holds together whether the clip lives on one platform or gets collected with the rest of your content on a mobile bio link page.
Frequently Asked Questions About Video Watermarking
A lot of confusion around watermarking comes from edge cases. The basics are easy. The details are where creators second-guess themselves.
Does adding a watermark reduce video quality
Adding a watermark doesn’t automatically ruin quality. The bigger issue is how you export the final file.
If you import a clean source file, use a transparent PNG watermark, and export with sensible settings, the watermark itself won’t be the main quality problem. Repeated re-exports, poor compression choices, and low-quality source assets usually do more damage than the overlay.
Should you use a text watermark or a logo watermark
That depends on recognition. If your logo is already familiar and readable at small sizes, a logo watermark usually looks cleaner. If your logo is abstract or hard to read on a phone, a simple text watermark may work better.
For many creators, the strongest option is a minimal wordmark or a simplified logo version built specifically for watermark use. The version you use on a website header isn’t always the version that works in video.
Can you remove a watermark from a video
Technically, parts of a watermark can sometimes be cropped, blurred, or edited around, especially if the mark sits near an edge. That’s one reason to think strategically about placement and visibility.
Legally and ethically, removing branding from content you don’t own is a different matter. If the video isn’t yours, don’t assume you’re free to strip the creator’s attribution. If the video is yours and you need a clean version, keep an unwatermarked master file before publishing.
Should the watermark stay on for the full video
Not always. It depends on format and purpose.
For tutorials, explainers, and long-form demonstrations, a persistent watermark usually makes sense because the video may get embedded or clipped later. For short-form content, selective timing can work well if the mark appears early and establishes identity without sitting too heavily over the whole edit.
A good rule is to match the watermark duration to the job the video needs to do. Branding-heavy promos can support stronger presence. Story-led creative edits usually benefit from a lighter touch.
If you’re serious about building a central home for your videos, links, products, and social profiles, Bio Links Page Builder gives you a simple way to organize everything on one mobile-friendly page. It’s a practical fit for creators who want scattered content to lead back to one clear destination.